Bookshelf cabinet with doors – modeled in an hour
A Bookshelf cabinet with doors and drawers is a very popular woodworking project.
A few years ago we conducted a survey on what SketchList 3D users were designing. While of course kitchens were at the top of the list, a bookshelf cabinet with doors was a close second. Who can’t sue more office storage? Sometimes they have door and drawers, a television, of computer equipment. So it’s a general category. One thing about that type of work — it really can challenge you in terms of custom work. And custom work presents the challenge of selling your client – since it’s harder for them to vision unique rather than cookie-cutter work.
A shop owner, Trent Tedder of Old Mill Custom Woodcrafting, [Link ] wanted to address this difficulty of selling custom work by learning to use SketchList 3D the segment of his business that provides bookshelf cabinet with doors and doors.
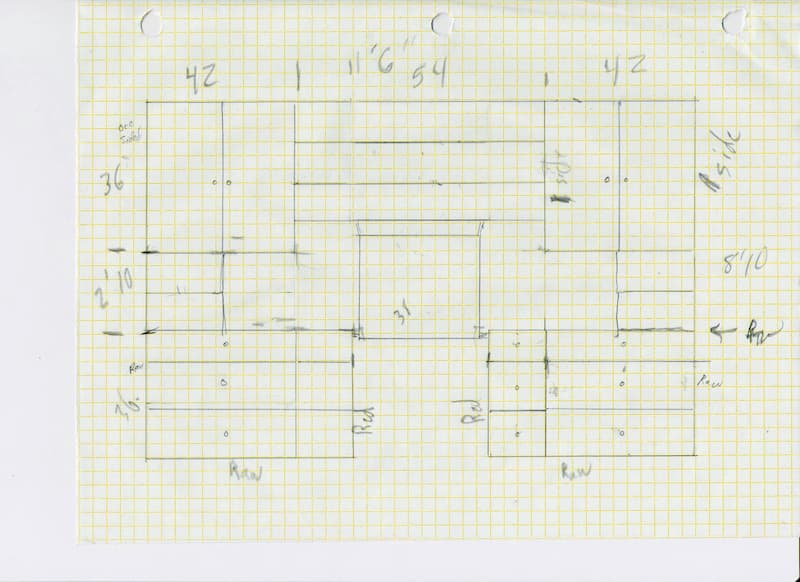
Trent emailed a copy of a hand drawing of the job he was proposing. In a one hour session, he shared the SketchList trainer’s screen and creates the model. This post shows what happened.
Drawing to modeling – the big switch over.
The bookshelf cabinet with doors and drawers might have been more of an office – since the center contained a drawing table / desktop.
Here’s the image we used for our effort. It gave us a starting point with Trent filling in the missing dimensions and details verbally.
This is the result as we completed the session. (We did not ‘install’ the top of the bottom cabinets since that material had not been selected yet.)
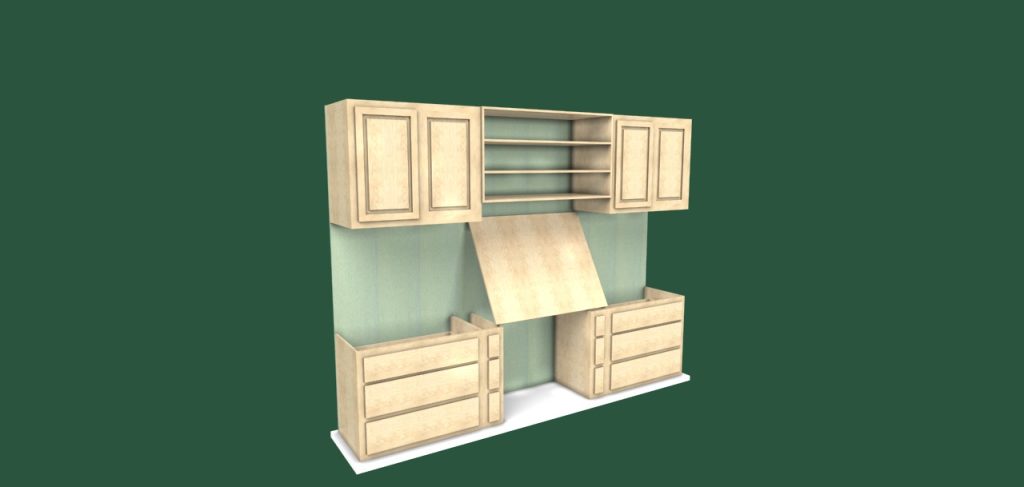
This model was completed in just over an hour.
The shop drawings, list, and optimized material layouts included – because they are integrated with the design process.
In this hour – social pleasantries and business questions included – Trent learned the 3 – 4 SketchList 3D concepts, the 3 tools used for all designs, how to output the reports, and the three steps in every design. These three steps repeat constantly: insert, size, locate. He also saw how tools like clone (space, and mirror included) and align speed design times.
The work we did.
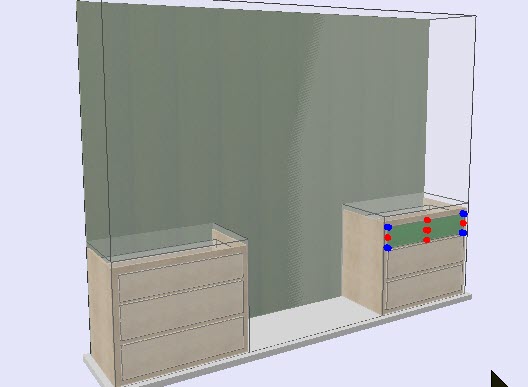
Working together we model the lower unit on the left – at least the box and face frames. After about the first 20 minutes Trent was given control over the mouse and keyboard. He then modeling the drawer in that unit, and cloned a copy and located it. Then he cloned another drawer but this time making the height 6 inches. Clone and mirror that first unit and the two lowers were done. He did that.
On his way to expert – he cloned the lower left unit, deleted the drawers, inserted the doors, resized and located it.
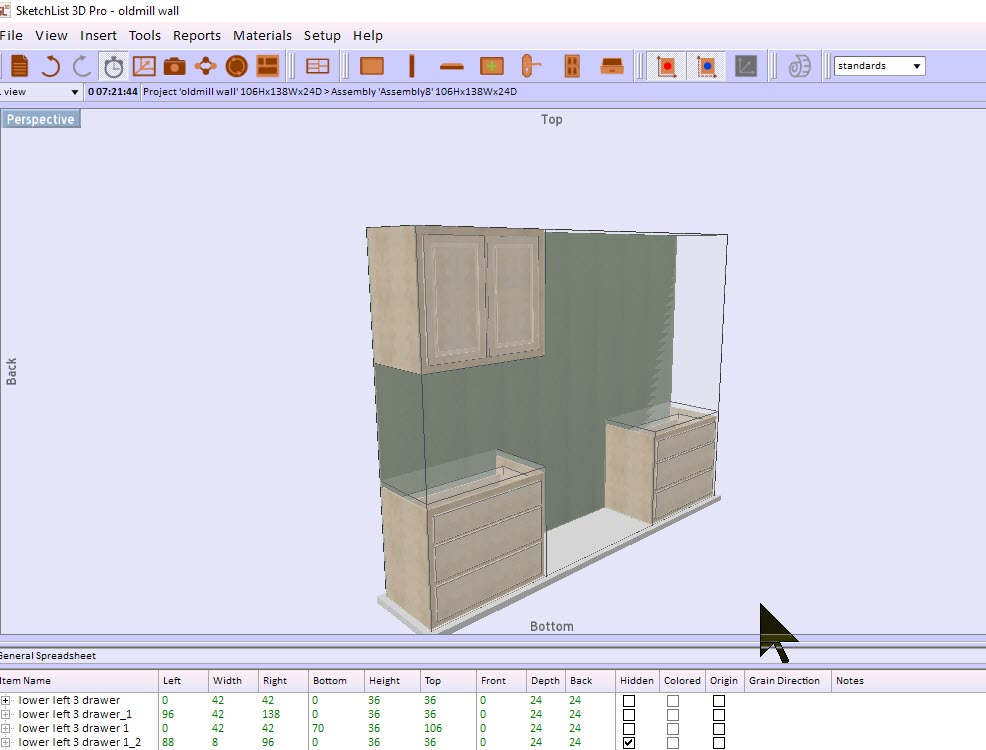
The center unit was ‘build from scratch’ but by this time Trent knows the 3-4 concepts, 3 steps, and how to use the 3 tools for sizing and locating. He ‘built’ that upper center bookcase in 2 or 3 minutes. Remember – his first time using SketchList 3D for his bookshelf cabinet with doors and drawers.
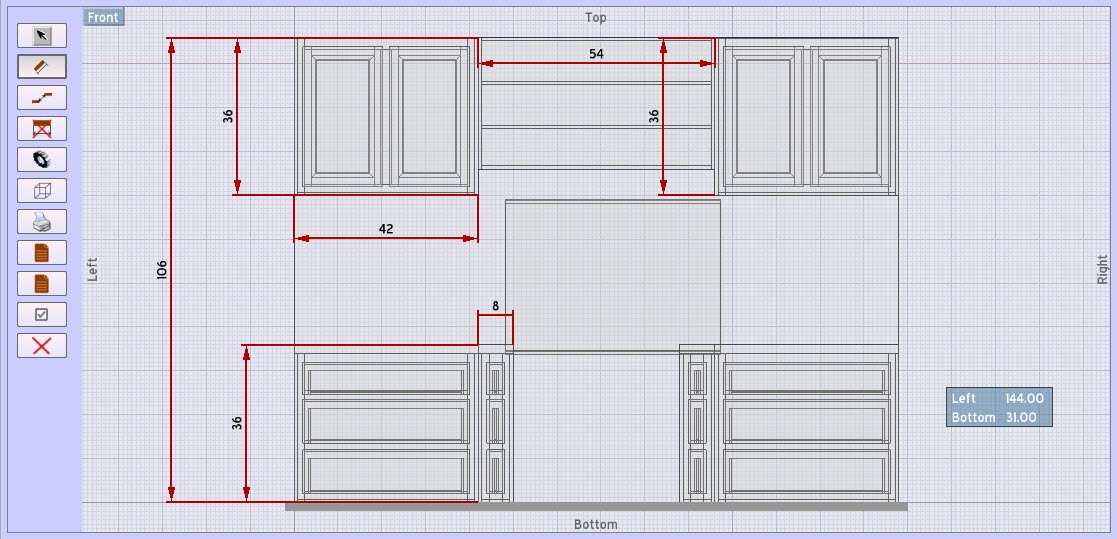
Now what he wanted at the beginning of the training was to give his prospect a non-hand drawing with dimensions. So here that is.
Ongoing process
And his work goes on. So in order to ingrain what he learned in this hour, he will re-create the model on his own computer. if and when he gets stuck he will ask for guidance from SketchList. As of today – no contact from him. Must be he’s getting along well.
If you run any type of woodworking business and want to save time, generate better proposals, and have the detailed reports necessary to minimize production errors – you should use SketchList 3D. The barrier we hear – not enough time to learn – goes away completely with the JumpStart training session. Make the change today. Call in. Get online and sign up. Take advantage of this powerful way to get you moving in the right direction.
