The Joinery Edging Dialog
The Joinery Edging dialog allows you to add a joint to the edge of a board. You must select a board edge that does not have holes before you can open this dialog.
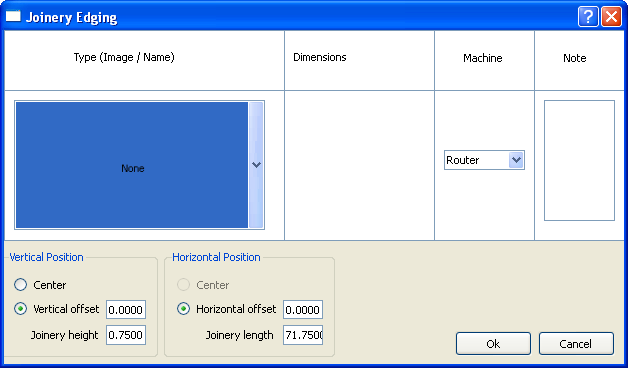
The Joinery Edging dialog is divided into six panes, as follows:
- The Type (Image/Name) pane. Choose the joint you want from the drop-down list.
- The Dimensions pane. Enter the dimensions of each part of the joint. The items in this pane will vary depending on the type of joint you chose.
- The Machine pane.
- The Note pane. Enter any information that you want to remember in this box.
- The Vertical Position pane. Use this pane to specify the joint's height and to center it or offset it from the left of the edge by a specified amount. The available choices in this pane will vary depending on the type of joint you chose.
- The Horizontal Position pane. Use this pane to specify the joint's length and to center it or offset it from the bottom of the edge by a specified amount. The available choices in this pane will vary depending on the type of joint you chose.
Related topics
The Contour Edging Dialog