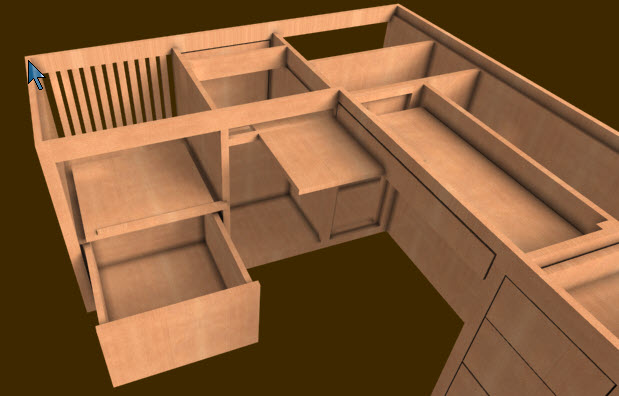
Making drawers for our entertainment wall unit
Making drawers virtually with SketchList 3D
This is the third of three posts and videos explaining how to design a wall storage unit with three assemblies container doors and drawers. You’ll find that making drawers on the computer screen allows you to think about the different methods you might use to design a drawer. Of course you can do it anyway you think is best.
This post goes through the process explaining how some of the SketchList 3D tools work. Remember, there are only 3 steps – insert, resize, and locate.
Let’s get stated.
Click on the left base unit and go to the assembly level so we can make changes that box.
- The drawer will sit on the interior shelf board. We’ll make sure that the drawer will fit by moving the shelf board downward. The bottom value of the top board in our example is 27 ¼ inches
- So the top value of the internal board, in order to put a 6 inch drawer between them, must be 21 ¼”. Click on the internal board. Right click on any of the “upper” blue dots. Type in 21 ¼ as the bottom value.
- Click the drawer icon at the top of the screen and drag it into the assembly. Notice that the drawer is simply an empty container in which you will build the drawer. Also the drawer is not located where we would want it.
First we must size the drawer and then locate it. There are only three actions in all of SketchList 3D – insert, size and locate. You’ve already inserted it.
- Size click on the empty container and using the form the top right of sketch list and type in the height of six and click the button labeled top.
- Click the middle shelf board. Right click the blue dot at the front left of that board. Click the copy button. Right click the blue dot lower left corner of the drawer. Click paste and it moves to the top of the cabinet.
- Click on the box and set its depth to 22 inches using the form at the right of sketch list. Type 22 into the depth text box and click the label Back.
- For the width you can use the form, red dots, or spreadsheet. Here we will use the spreadsheet in your cabinet design software to show how it works.
- Click on the drawer. And notice that the drawer row in the spreadsheet is highlighted.
- In the column labeled left find the row that contains the right side board. In my example the the value of left of that board is 35 ¼.
- Click on that cell intersecting the drawer row in the right column. Now type in 35 ¼. At this point click on the width column heading for that drawer. You will see that the drawer is now between the left and right sides of the cabinet.
To complete the drawer go to that level. At this point you will construct the drawer. Remember all SketchList 3D designs are accomplished in three actions these are 1 insert, 2 resize, and 3 locate.
 Making drawers.
At the top of the form there are three icons representing the boards that will go into your drawer.
- Start by dragging in the front board icon. Shift drag the red dots of that board to resize it to fill the front of the container.
- Then clone that board and using the slider front to back found in the upper right corner of sketch list slide the cloned board to the back.
- Next drag in the vertical board icon. And again using the red dot (this time holding down the shift key which will make the board snap between the others) size that board to fit between the front and the back.
- Clone and shift this board to the right. In fact, you can use the clone and mirror button.
- Drag in the horizontal board icon. Now you already know how to size using the red dots – or maybe the red dot holding down the shift key method.
- Finally go to the assembly level and you’ll see the box inserted into the space unit.
Making drawers can be fun or can be challenging. It will certainly be easier when you have detailed cut lists and shop drawings to help you.
For more information see: LINK
